If you’re managing content in SharePoint Online, you already know that retention policies aren’t optional. They are essential for staying compliant, sticking to internal governance standards, and keeping your environment clean and under control.
But setting them up isn’t always straightforward. The interface can be unintuitive, and terms like adaptive scope versus static scope don’t exactly explain themselves. You need practical guidance, not trial and error.
That’s exactly what this guide is for.
Here’s what you’ll learn:
- What site retention policies actually do in SharePoint Online
- How to create a new policy in the Microsoft Purview Compliance Portal
- What the different scope options mean, and how to choose the right one for your organisation
Let’s walk through it step by step.
What Are Site Retention Policies in SharePoint Online?
Retention policies define how long content should be kept before it is automatically deleted or moved. They support legal, regulatory, and business requirements, help reduce storage consumption, and prevent SharePoint from turning into a digital junk drawer.
In SharePoint Online, retention policies can be applied to:
- Entire sites
- Specific files or folders
- Particular types of content
They also override manual deletion attempts. Even if someone tries to delete a file, the system keeps it for the duration of the retention period. Once that period expires, the item is either deleted or moved to the Recycle Bin, depending on how you have configured the policy.
In this blog, we will focus on creating a site-level retention policy.
Where to Create Retention Policies: Microsoft Purview Compliance Portal
To create and manage retention policies, you will use the Microsoft Purview Compliance Portal. This was previously called the Microsoft 365 Compliance Center.
Here is how to get there:
Here’s how to get there:
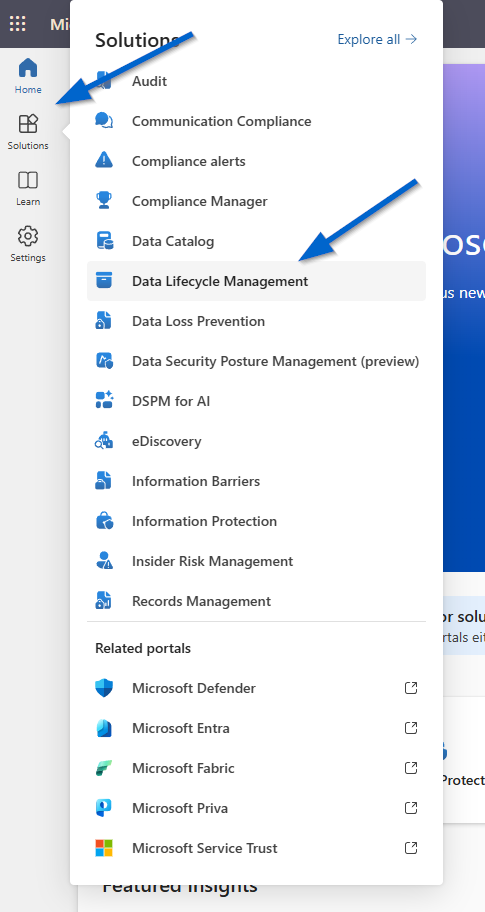
- Go to purview.microsoft.com
- In the left-hand navigation pane, click on Solutions and select Data lifecycle management
- Then click on Retention policies under the Policies section
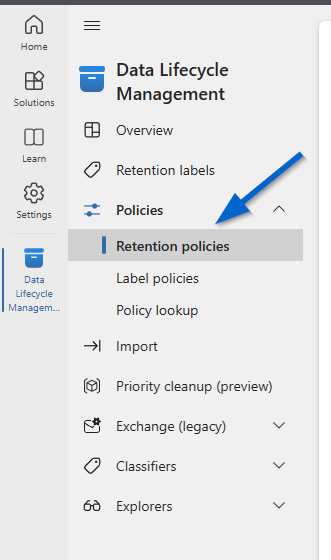
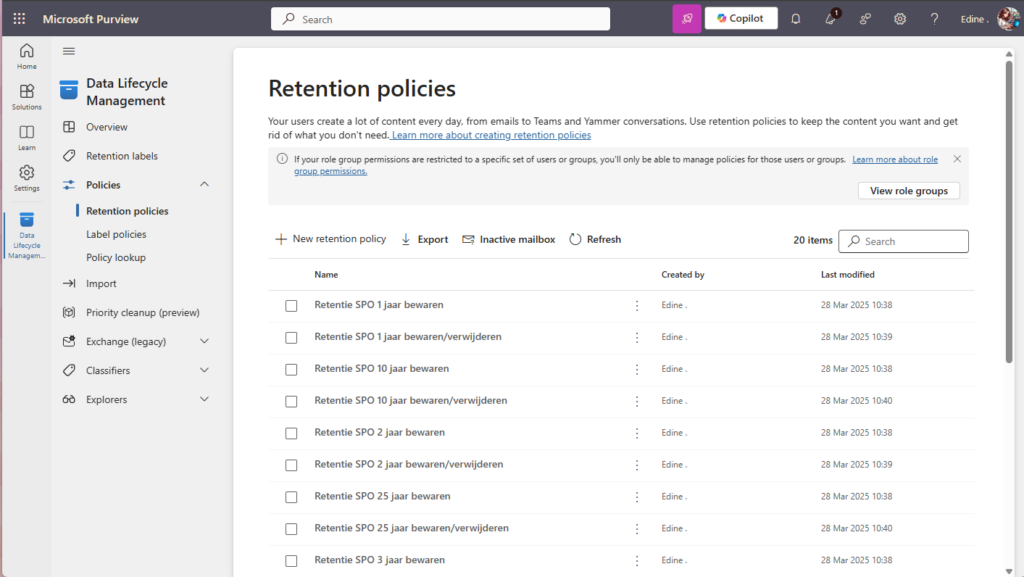
This is where you’ll see all your current retention policies and where you can create new ones.
Step-by-Step: How to Create a New Site Retention Policy
Here’s how to set up a new retention policy from start to finish:
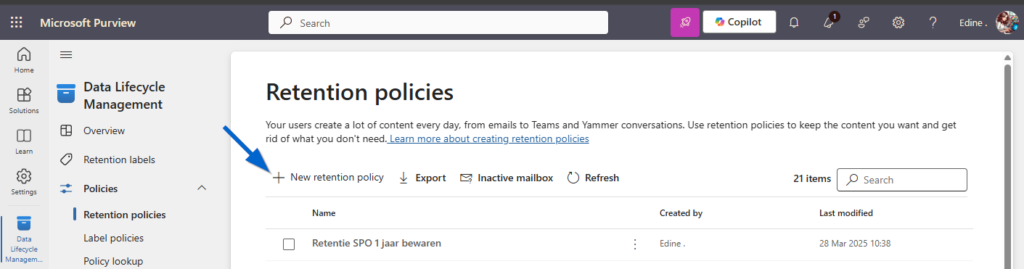
Step 1: Start a New Policy
- Click + New retention policy
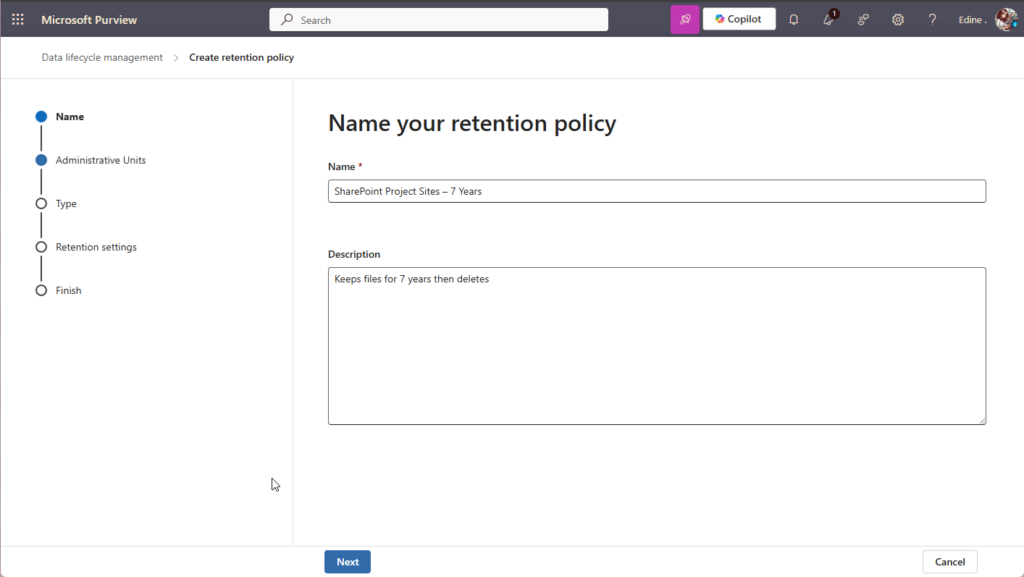
Step 2: Name the Policy
- Give your policy a clear, descriptive name (e.g. “SharePoint Project Sites – 7 Years”)
- Add an optional description to help other admins understand the purpose
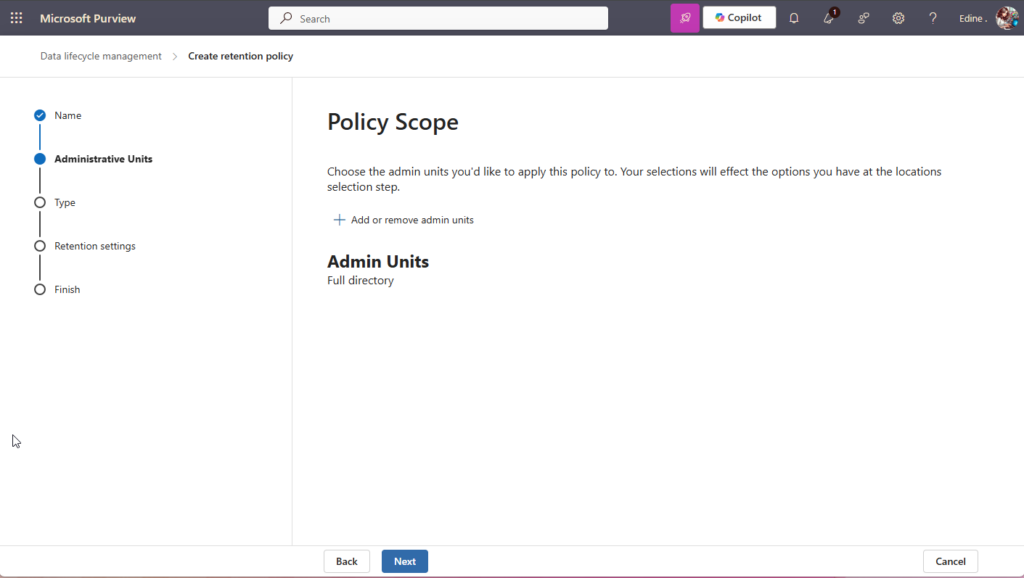
Step 3: Choose Administrative Units (Optional)
- If you use Administrative Units in Microsoft 365 to group users and services, you can apply the policy to specific units
- Otherwise, just click Next
4. Choose Your Policy Scope: Adaptive or Static
This is the step that tends to cause the most confusion, so let’s keep it simple.
Static scope
You manually select the SharePoint sites where the policy will apply.
This is a good option for smaller environments or when the list of sites rarely changes.
Adaptive scope
You apply filters based on attributes like site name, URL, or metadata.
The policy is automatically applied to any site that matches the criteria, including new sites created later.
This is the better choice for large environments or when you want the policy to scale automatically.
Not sure which one to go with?
If your list of sites is small and stable, go with Static.
If you’re working with a large or constantly growing environment, Adaptive will save you time and effort over the long term.
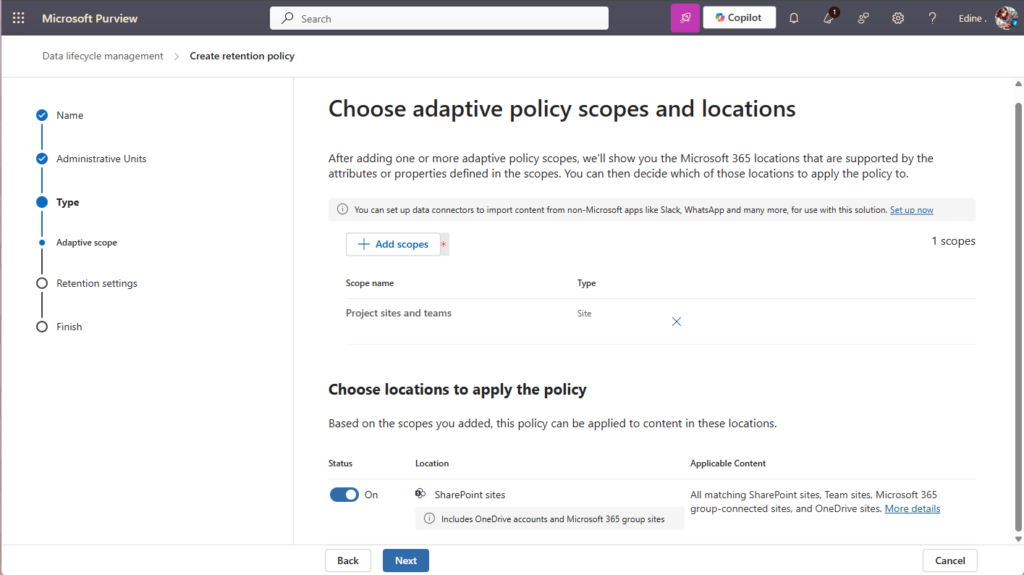
5. Apply the Policy to SharePoint Sites
Once you’ve chosen your scope type:
- Select SharePoint Sites as the location
- If you chose Static, pick the sites you want to include
- If you chose Adaptive, define the filters to target the right sites
- You can also choose to include OneDrive or Exchange if needed (this only applies when using Static scope)

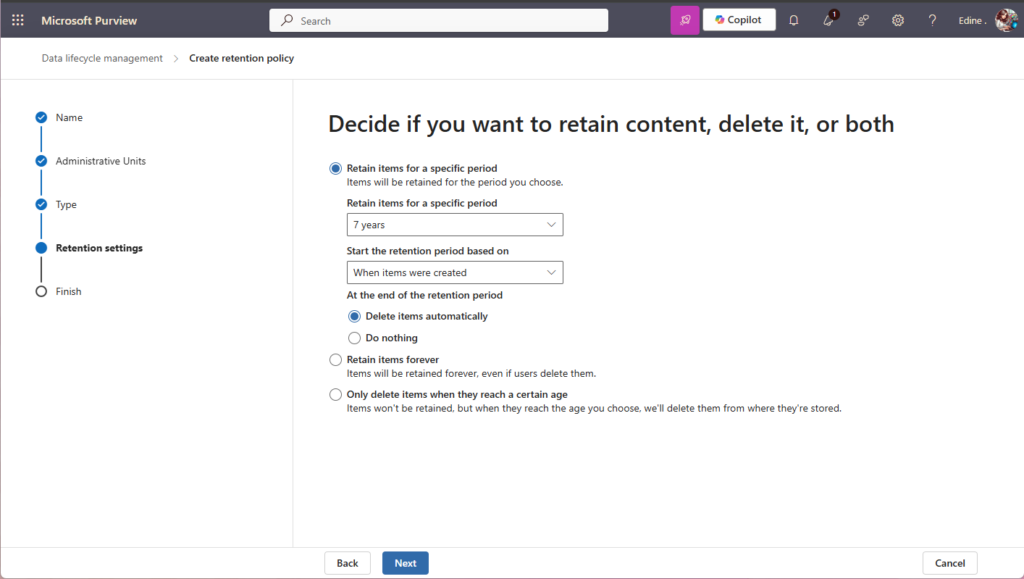
6. Set Your Retention Settings
This is where you define what the policy actually does.
Decide how long to retain content, for example, 7 years.
Then choose what should happen when that period ends:
- Delete content automatically
- Trigger a disposition review so someone can decide what to do
- Do nothing, which simply marks the item as expired but keeps it in place
There’s also an option not to retain files at all. In that case, the system will delete them automatically after the chosen period, but users can still delete items manually before that time. This approach is useful if you’re more concerned with cleanup than retention.
You can also choose when the retention period starts.
It can be based on the date the content was created or the date it was last modified.
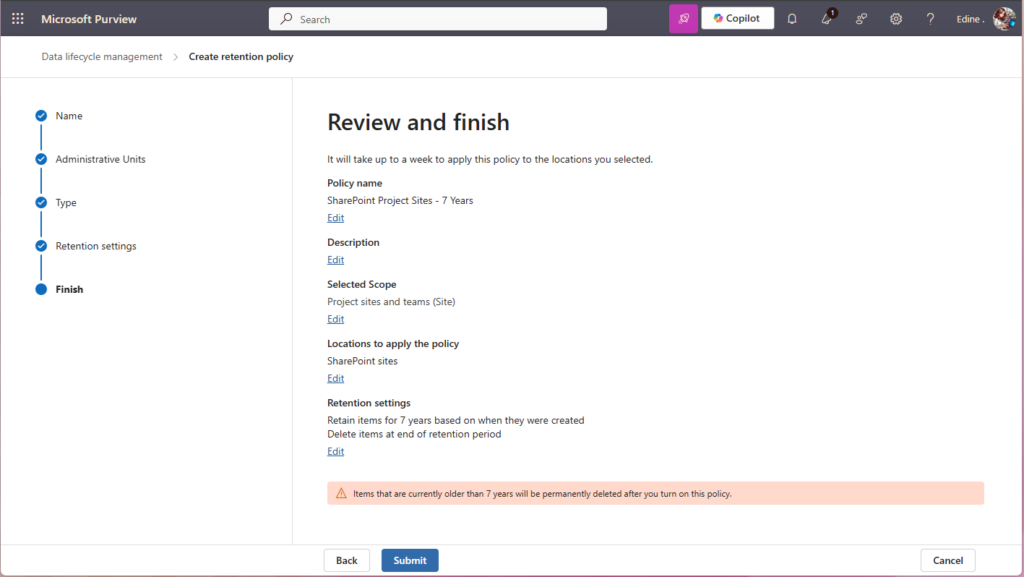
7. Review and Create the Policy
Once everything is configured:
- Review your settings
- Click Submit to create the policy
It can take up to a week for the policy to become active. In larger environments, applying the policy across all selected sites may take longer.
8. Best Practices and Things to Watch Out For
A few practical tips to keep your policies clean and effective:
- Test on a pilot site before applying the policy broadly
- Be cautious with delete actions, since they cannot be undone
- Use clear naming conventions so the purpose of each policy is easy to understand
- Review your policies regularly to make sure they are still relevant
Also, make sure users are aware of what is being retained and deleted. It saves time and confusion later.
Microsoft 365 Retention Rules in a Nutshell:
- Retention wins over deletion: If one rule says to retain and the other says to delete, the item is retained.
- Longest retention wins (when all rules say to retain).
- Shortest deletion wins (when all rules say to delete).
- Explicit wins over implicit:
- Retention label applied to a file beats a policy applied to the whole site.
Final Thoughts
Site retention policies in SharePoint Online are easier to manage once you understand the key concepts. Whether you support a few key project sites or run an enterprise-wide governance strategy, getting these policies right is essential for compliance and clarity.
Take your time to set it up properly, and you’ll thank yourself later.