If you’re rolling out Microsoft 365 Copilot or just trying to limit what pops up in organisation-wide search, Restricted SharePoint Search (RSS) gives you control over which sites are visible to tools like Copilot. SharePoint Restricted Search is part of SharePoint Advanced Management, soon to be included with a Microsoft 365 Copilot license.
Here’s exactly how to set it up, without the fluff.
Step 1: Check if Restricted Search Mode Is Already On
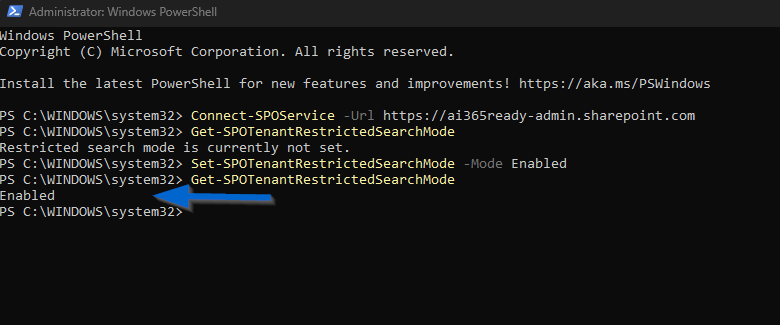
First, see where you’re starting from. Open PowerShell with an account that is at least SharePoint Online Administrator and run this:
Get-SPOTenantRestrictedSearchMode


This tells you whether Restricted Search Mode is enabled or not. Simple. By default, it is off (shows not set).
Step 2: Enable Restricted Search Mode
To start locking things down, you’ll need to flip the switch. Here’s how to turn it on:
Set-SPOTenantRestrictedSearchMode -Mode Enabled
Want to go back later and open everything back up? Just run:
Set-SPOTenantRestrictedSearchMode -Mode Disabled
This controls whether search (and Copilot) is restricted to only a list of approved SharePoint sites.
Step 3: Add SharePoint Sites to Your Allowed List
Once the mode is enabled, nothing will show up in global search or Copilot unless it’s on the allowed list.
To add a single site:
Add-SPOTenantRestrictedSearchAllowedList -SitesList @("https://contoso.sharepoint.com/sites/finance")
Just replace the URL with your actual site.
To add a bunch of sites at once:
If you’ve got a lot of sites, it’s faster to use a CSV.
Create a CSV with one column listing each site URL using the SharePoint Admin Center.
First, go to the SharePoint Admin Center and go to Active sites. Filter the sites to Accessed in the last 30 days.
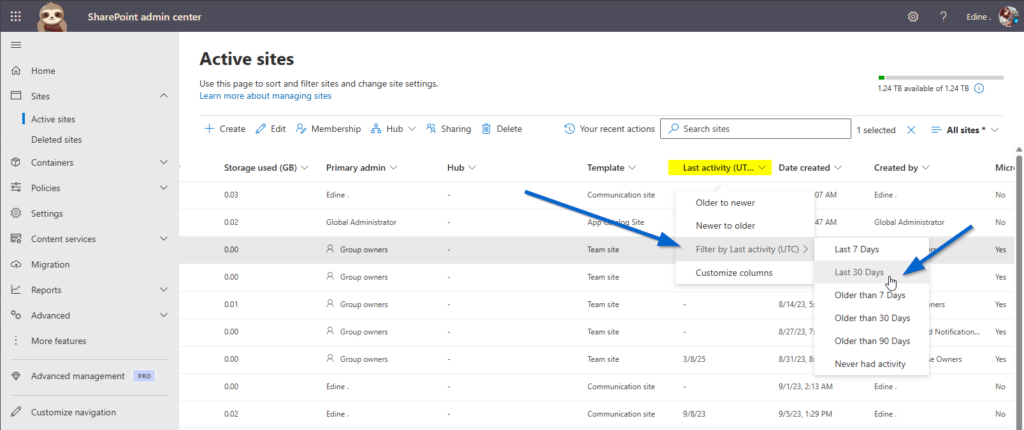
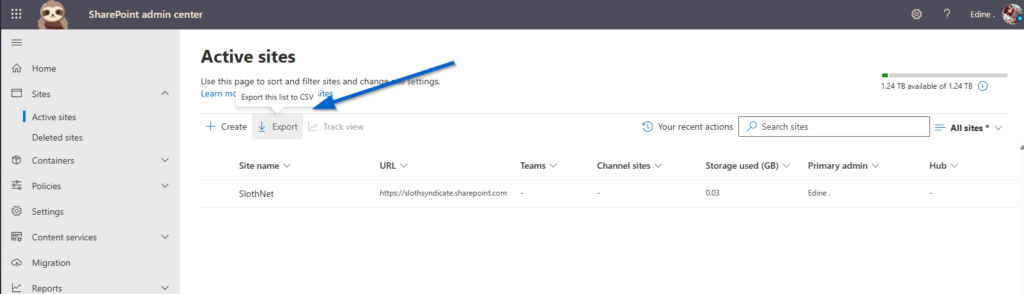
You now only see the sites that have been active in the last 30 days. Click export to create a csv file, and use the URLS in there to create a list of site URLs that you can insert in RSS with PowerShell.
Add-SPOTenantRestrictedSearchAllowedList -SitesListFileUrl "C:\location\sites.csv"
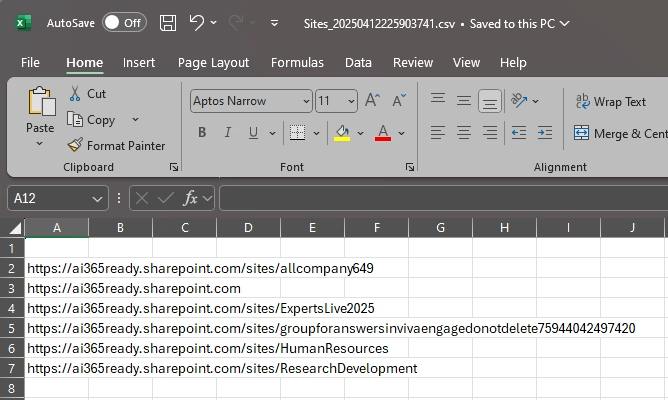
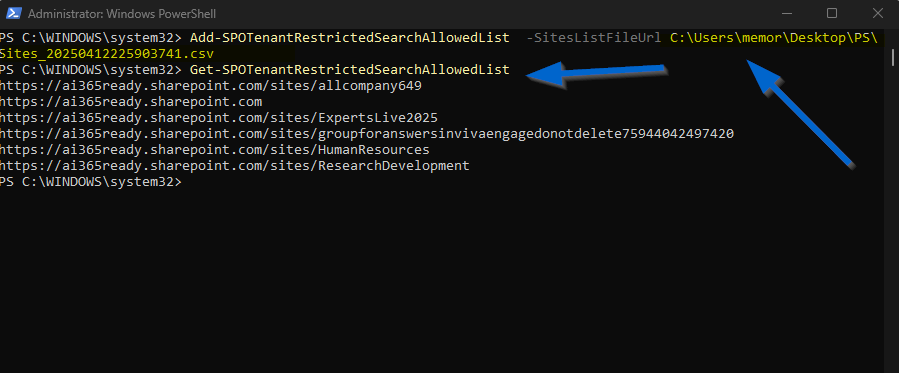
That’ll bulk add everything in one go.
Step 4: What This Changes for Copilot
Once RSS is on and your list is in place, here’s what happens:
- Copilot can only pull content from the sites on your allow list.
- Sites not on the list are invisible to Copilot in its answers.
- Users can still access anything they have permissions for, it just won’t show up in global search or Copilot’s responses.
This gives you a tight grip on what content gets surfaced while you sort out oversharing or messy permissions in the background.
That’s it! Just four clear steps to get RSS working. It’s quick to implement, flexible to update, and gives you breathing room while you clean up your tenant.
Pro tip: You can include up to 100 sites. Hub sites count as one, no matter how many associated sites they have.
Need to back this out? Just disable Restricted Search Mode and search visibility will return to normal, based on user permissions.